
发布时间:2024-05-27
如今当用户需要处理PDF文件时,通常不得不下载应用程序或者浏览器插件,控制用户如何与PDF交互并不是一件容易的事。如果我们提供PDF作为内容,用户可以下载它并使用浏览器或PDF本身提供的控件进行交互。然而,一些企业可能希望控制用户使用PDF的方式,以提供更好的体验或在某些条件下限制下载。
构建这样的解决方案需要在后端和前端都付出巨大的努力,然而如果有一种方法可以让您在Angular PDF Viewer中用几行代码来管理PDF交互呢?Kendo UI for Angular PDFViewer可以帮助大家解决上述的一些问题,它以最佳的方式应用到每个合适的场景中。
P.S:Kendo UI for Angular是专用于Angular开发的专业级Angular组件,这些组件是专门为Angular构建的,没有任何jQuery依赖项。
在上文中(点击这里回顾>>),我们为大家介绍了构建PDF阅读器的基本设置、布局和PDF查看器构建等,本文将继续介绍如何处理Kendo UI PDF阅读器事件!
Kendo UI for Angular 2024 Q1新版下载
我们有几个挑战需要解决:
您觉得工作太多了吗?Kendo UI PDF Viewer使用事件侦听器和几行代码简化了这个过程。
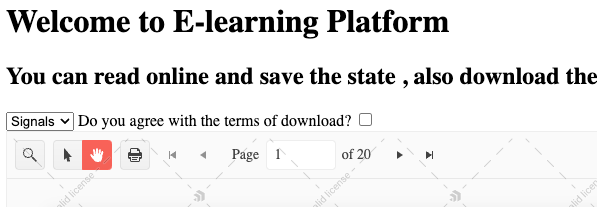
默认情况下,Kendo PDFViewer显示工具栏中的所有选项。然而我们想要更多的控制,并希望当用户同意条款和条件显示下载按钮。
Kendo UI PDF Viewer允许我们通过提供PDFListViewerTool键数组来定义工具栏中的选项列表,可以在reader.service.ts中指定这个列表,并在其后面添加一个包含所需工具栏选项的新数组。
最后实现一个allowDownload方法,将“download”键添加到工具栏选项数组中。这样当用户接受条款和条件时,“download”选项就可用了。
最后的代码看起来是这样:
import { Injectable } from '@angular/core';
import {PDFViewerTool} from "@progress/kendo-angular-pdfviewer";

export class ReaderService {
public assetURL = 'http://localhost:4200/assets/';

private currentPage: number = 0 ; // Initialize with the default page
private storageKey: string = 'book-page';

//list of new list of options
public toolbar: PDFViewerTool[] = ['search', 'selection', 'print', 'pager'];

savePage(page: number) {
localStorage.setItem(this.storageKey, page.toString());
}

getPage() {
const savedPage = localStorage.getItem(this.storageKey) || this.currentPage;
return +savedPage;
}

allowDownload(acceptTerms: boolean) {
if (acceptTerms) {
this.toolbar.push('download');
} else {
this.toolbar.pop();
}
}
}
接下来,声明一个名为toolbarOptions的新变量,并绑定readerService.toolbar:
toolbarOptions = this.readerService.toolbar;
然后将kendo-pdfviewer组件中的tools属性链接到toolbarOptions:
<kendo-pdfviewer
[tools]="toolbarOptions"
[saveFileName]="bookName"
[url]="pdfAssetUrl">
</kendo-pdfviewer>
保存更改后,您将注意到工具栏现在只显示前四个选项,由toolbarOptions指定。
为了仅在用户同意这些条款时显示“download”选项,我们需要采取几个步骤。
首先创建一个名为acceptTerms的变量,使用Angular的ngModel和ngModelChange事件,我们就可以调用一个名为activateDownload的新方法,这个方法将触发我们服务中的allowdownload方法来更新工具栏选项。
export class AppComponent {
....
acceptTerms: boolean = false;

activateDownload() {
this.readerService.allowDownload(this.acceptTerms);
}
}
在app.component.html文件中,我们可以使用ngModel来绑定acceptTerms变量,并通过(ngModelChange)事件来监听变化。当用户与复选框交互时,此事件将触发activateDownload方法。
<input [(ngModel)]="acceptTerms" id="acceptTerms" type="checkbox" (ngModelChange)="activateDownload()"/>
保存更改,现在当选中“Agree with the Terms of Download”复选框时,“Download”选项应该出现在工具栏中,当您取消选中它时,它应该消失。

现在可以控制工具栏了!接下来,让我们深入研究Kendo UI PDF Viewer的事件处理功能。
Kendo UI PDF Viewer提供了两个方便的事件:load和pageChange,我们将把这些事件附加到reader.service中的方法上,来加载或保存相关信息。
为此打开app.component.ts并创建一个名为saveCurrentPage的方法,该方法接受PDFViewerPageChangeEvent作为参数,此事件对象包含有关PDF中当前页面的信息。
saveCurrentPage($event: PDFViewerPageChangeEvent) {
this.readerService.savePage($event.currentPage);
}
在HTML文件中,将pageEvent与saveCurrentPage方法关联起来,并将PDF查看器的高度设置为600像素。
<kendo-pdfviewer
[tools]="toolbarOptions"
[saveFileName]="bookName"
[url]="pdfAssetUrl"
style="height: 600px;"
(pageChange)="saveCurrentPage($event)">
</kendo-pdfviewer>
保存更改后,服务将在本地存储中存储book-page键。
要在用户加载PDF时跳转到特定的页面,并访问Kendo UI for Angular PDFViewer,我们可以使用Angular的ViewChild装饰器,这允许访问组件并监听加载事件。
首先向Kendo UI PDF Viewer组件添加一个模板引用,然后用一个名为loadPage()的新方法链接加载事件。
<kendo-pdfviewer
#pdfViewer
[tools]="toolbarOptions"
[saveFileName]="bookName"
[url]="pdfAssetUrl"
style="height: 600px;"
(pageChange)="saveCurrentPage($event)"
(load)="loadPage()"
>
</kendo-pdfviewer>
在app.component.ts中,声明一个与模板引用同名的ViewChild pdfViewer来访问PDFViewerComponent引用和bookPage来存储来自服务的getPage:
@ViewChild('pdfViewer') pdfViewer!: PDFViewerComponent;
bookPage = this.readerService.getPage();
添加loadPage方法,该方法利用pdfViewer的scrollToPage函数导航到readerService.getPage返回的页面。
loadPage() {
this.bookPage = this.readerService.getPage();
this.pdfViewer.scrollToPage(this.bookPage);
}
保存更改,PDF将跳转到您查看的最后一页。
为了锦上添花,我们希望在用户达到页面限制时阻塞UI,并阻止他们移动到下一页。
打开app.component.html,首先将只在选择图书时显示kendo-pdf-viewer和paywall,在ng-container中添加一个*ngIf指令来监视bookName。此外,使用另一个*ngIf指令来显示基于showMessageWall变量的paywall。
<ng-container *ngIf="bookName">
...

<div class="pay-wall" *ngIf="showMessageWall">
<h1>You reach limit to read </h1>

<button (click)="showMessageWall = false"> close</button>
</div>
</ng-container>
在app.component.ts中,添加两个新变量:
pageLimit = 2;
showMessageWall = false;
添加一个新方法来验证currentPage是否超过pageLimit,如果为true,则将showMessageWall设置为true,并使用scrollToPage方法跳转回pageLimit。
private canReadMore(currentPage: number) {
if (currentPage > this.pageLimit) {
this.pdfViewer.scrollToPage(this.pageLimit);
this.showMessageWall = true;
} else {
this.showMessageWall = false;
}
}
最后在saveCurrentPage函数中调用此方法,以便在每次用户更改页面时触发它。
saveCurrentPage($event: PDFViewerPageChangeEvent) {
const { currentPage } = $event;
this.readerService.savePage(currentPage);
this.canReadMore(currentPage);
}
继续保存它们,在那之后我们看到整个工作流程如预期的那样运行:Kendo UI for Angular PDFViewer加载、工具栏自定义,以及当页面达到限制时出现的paywall。
我们已经演示了Kendo UI for Angular PDFViewer如何为您节省时间和精力,借助工具栏自定义和事件处理等开箱即用的功能,您可以用最少的代码快速构建功能丰富的PDF查看器。保存用户偏好和集成paywall功能为您的应用程序增加了一层额外的复杂性,增强了用户体验。
Telerik_KendoUI产品技术交流群:726377843 欢迎一起进群讨论
 023-68661681
 返回
返回