
发布时间:2023-03-03
Kendo UI致力于新的开发,来满足不断变化的需求。Kendo UI for Vue使用旨在提高性能和丰富用户体验的Vue组件,帮助开发人员构建下一代应用程序。它是为Vue技术框架提供可用的Kendo UI组件,以便更快地构建更好的Vue应用程序。
购物程序可以帮助用户追踪购买商品,今天将为大家介绍如何使用响应式UI组件Kendo UI for Vue来构建购物应用程序。
在本文中,我们将学习什么是Kendo UI,以及如何使用Vue.js构建快速高效的购物应用程序。
Telerik_KendoUI产品技术交流群:726377843 欢迎一起进群讨论
开发者必须具备使用Vue的基本知识,并且熟悉创建Vue项目。
Kendo UI是一个JavaScript组件库,用于构建一个完全交互式和高性能的网站,它由四个UI库组成——Vue, Angular, React 和 jQuery,Kendo UI能创建移动、Web和桌面用户创建应用程序。
Kendo UI有可配置的组件来完成Web应用程序创建,它有很全的帮助文档,包含了开发者想要在项目中实现的组件和功能的许多代码示例和演示。
接下来我们一起看看如何在项目中使用Kendo UI for Vue,第一步是创建应用程序。
用Vue创建一个项目,使用下面的命令:
vue create shopping-app
要运行服务器,使用下面的命令:
Npm run serve
要设置和安装Kendo UI,请访问Kendo UI for Vue并向下滚动到名为“All Vue Components”的部分,接下来要选择用于项目的组件。在本文中,我们将在应用程序中使用card组件。
安装
要安装card组件,使用下面的命令:
npm install –save @progress/kendo-vue-layout @progress/kendo-vue-intl
安装组件包后,下一步是为安装的组件安装CSS样式(主题),要安装它使用下面的命令:
npm install –save @progress/kendo-theme-default
在安装card布局后,要安装组件的许可授权密钥,使用下面的命令:
npm install –save @progress/kendo-licensing
设置
现在已经成功安装了包,下一步是设置card的布局和主题。
为此我们创建Vue组件CardComponent.vue并导入脚本标记中的包。
<script>
import {
Card,
CardHeader,
CardBody,
CardTitle,
CardFooter,
} from "@progress/kendo-vue-layout";
import '@progress/kendo-theme-default';
import { Button } from '@progress/kendo-vue-buttons';
export default {
components:{
card: Card,
cardHeader: CardHeader,
cardBody: CardBody,
cardTitle: CardTitle,
cardFooter: CardFooter,
'kbutton': Button
}
}
</script>
在导入需要的所有包之后,将创建我们的卡片。
<template>
<card
style='width: 300px; margin: auto;'
>
<cardHeader>
<cardTitle>Shopping List <span class="k-icon k-i-calendar"></span></cardTitle>
</cardHeader>
<cardBody>
<p>
Shopping Items
</p>

</cardBody>
<cardFooter>

<span>
<kbutton :theme-color="'primary'">Add List</kbutton>
</span>
</cardFooter>
</card>
</template>
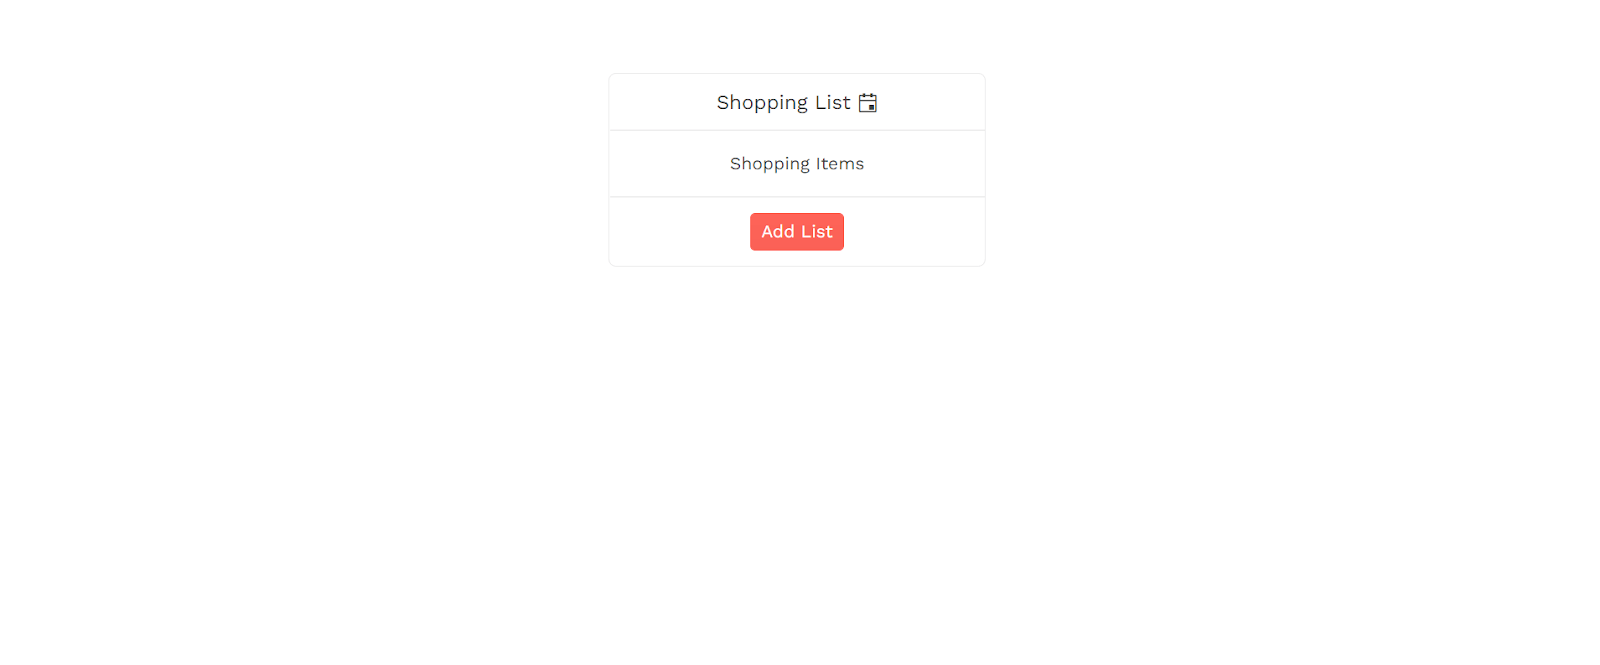
下面是我们的应用程序应该是什么样的示例:
本节将使用Vue中的for循环获取我们的项目,接下来看看下面的示例:
<cardBody>
<div class="list">
<li v-for="(list, index) in lists" :key="index">
<div class="form-box">
<input type="checkbox" v-model="list.checked" class="input-box" />
<label class="label">
{{ list.text }}
</label>
<span class="k-icon k-i-cart"></span>
</div>
</li>
</div>
</cardBody>
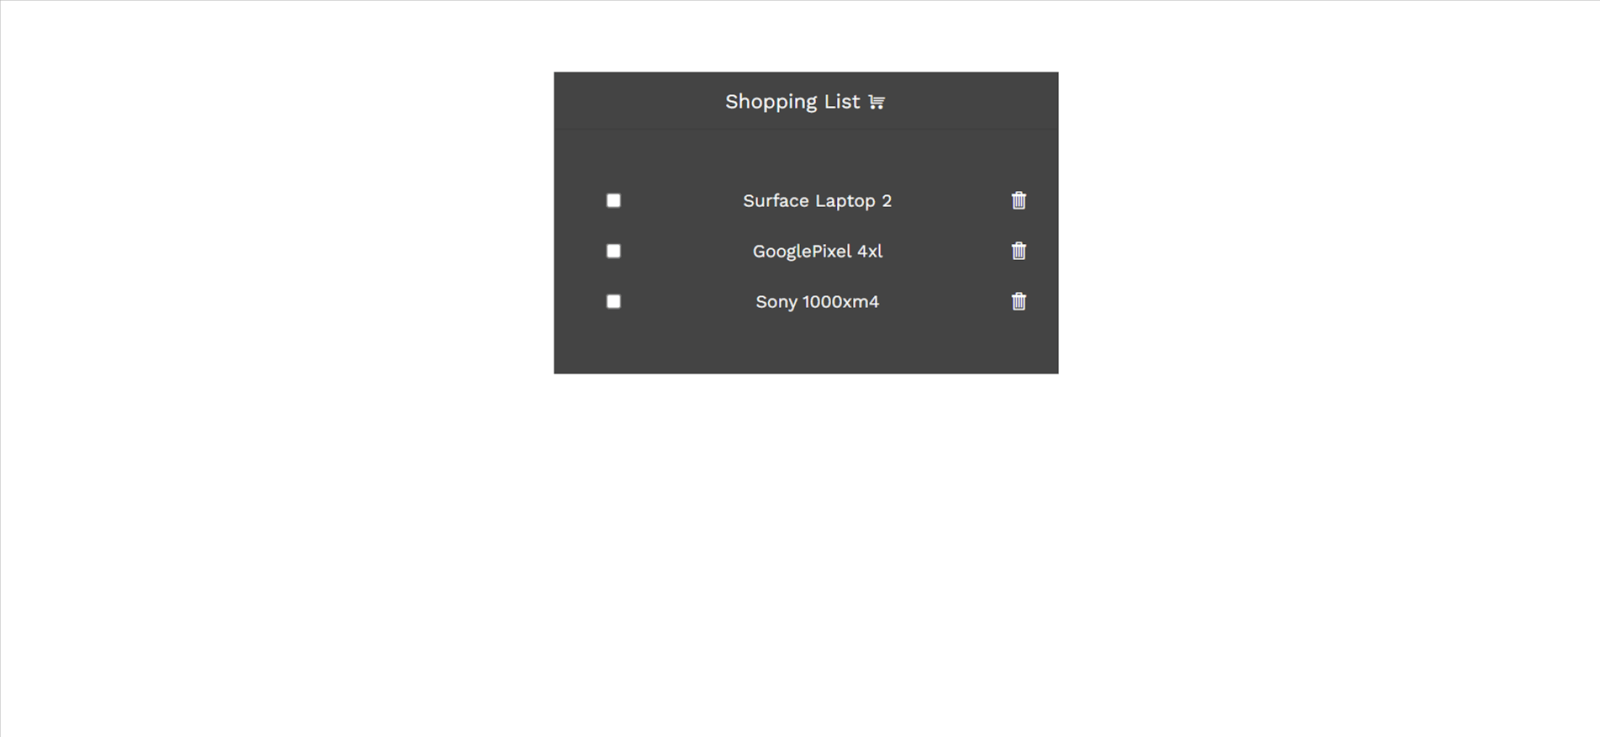
下面是应用程序在获取我们的项目后的输出:
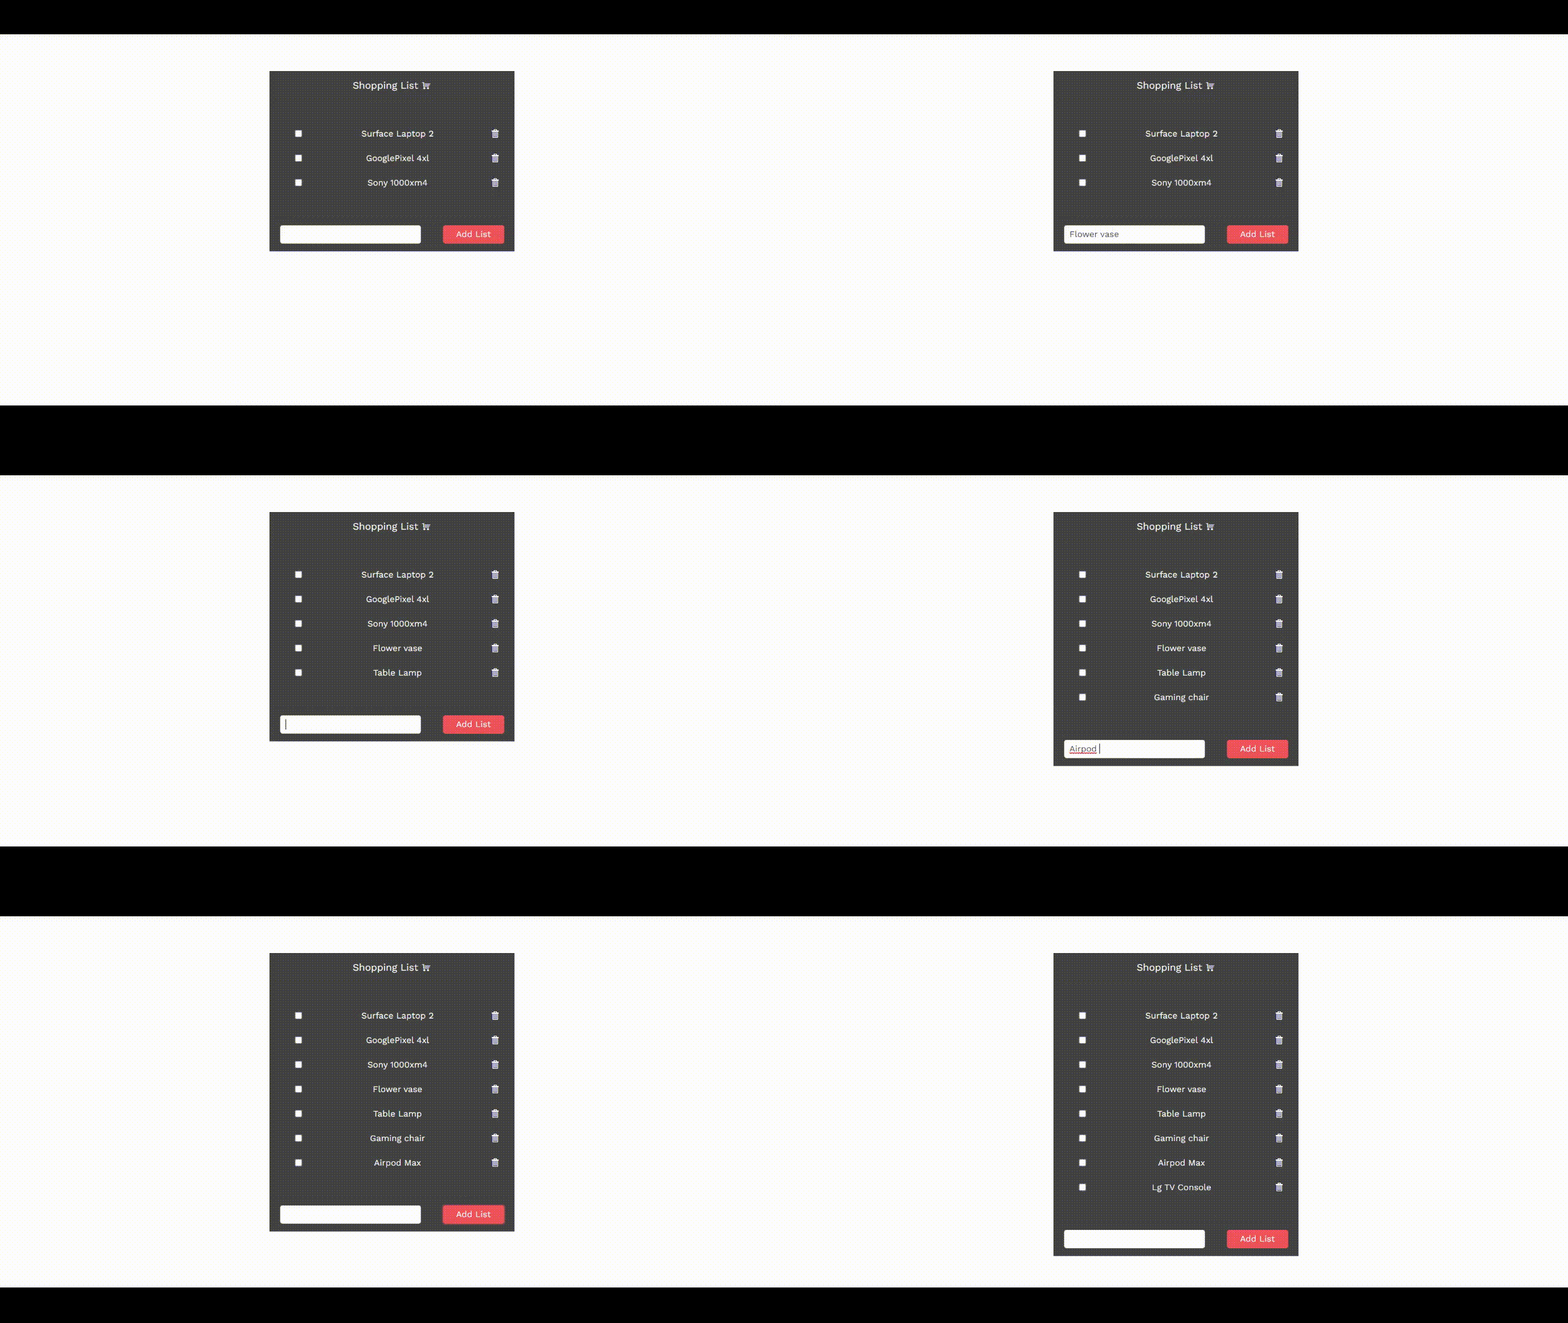
目前我们已经获取并显示了项目,下一步是创建一个新的列表,用户可以在其中向购物列表中添加更多项目。要做到这一点,我们将创建一个输入和按钮,见下面的代码:
<cardFooter class="footer-section">
<div class="col-xs-12 col-md-6 example-col">
<KInput
:style="{ width: '230px' }"
v-model="currentList"
v-on:keyup.enter="addList"
></KInput>
</div>
<div class="col-xs-12 col-md-6 example-col">
<kbutton
:theme-color="'primary'"
:style="{ width: '100px' }"
@click="addList"
>Add List</kbutton
>
</div>
</cardFooter>
在这个例子中,我们创建一个返回空列表的数据:
data() {
return {
currentList: "",
};
},
函数addList将添加到购物列表应用程序中的新项目推送。
methods: {
addList() {
this.lists.push({ text: this.currentList, checked: false });
this.currentList = "";
},
},
我们已经了解了如何向购物清单中添加新项目,下一步是添加一个delete list函数,将从它的索引中删除一个列表,如下所示:
<span class="k-icon k-i-trash" v-on:click="removeList(index)"></span>
我们将创建一个名为removeList的函数,它将使用索引从列表中删除一个项目。请看下面的代码:
removeList(index) {
this.lists.splice(index, 1);
},
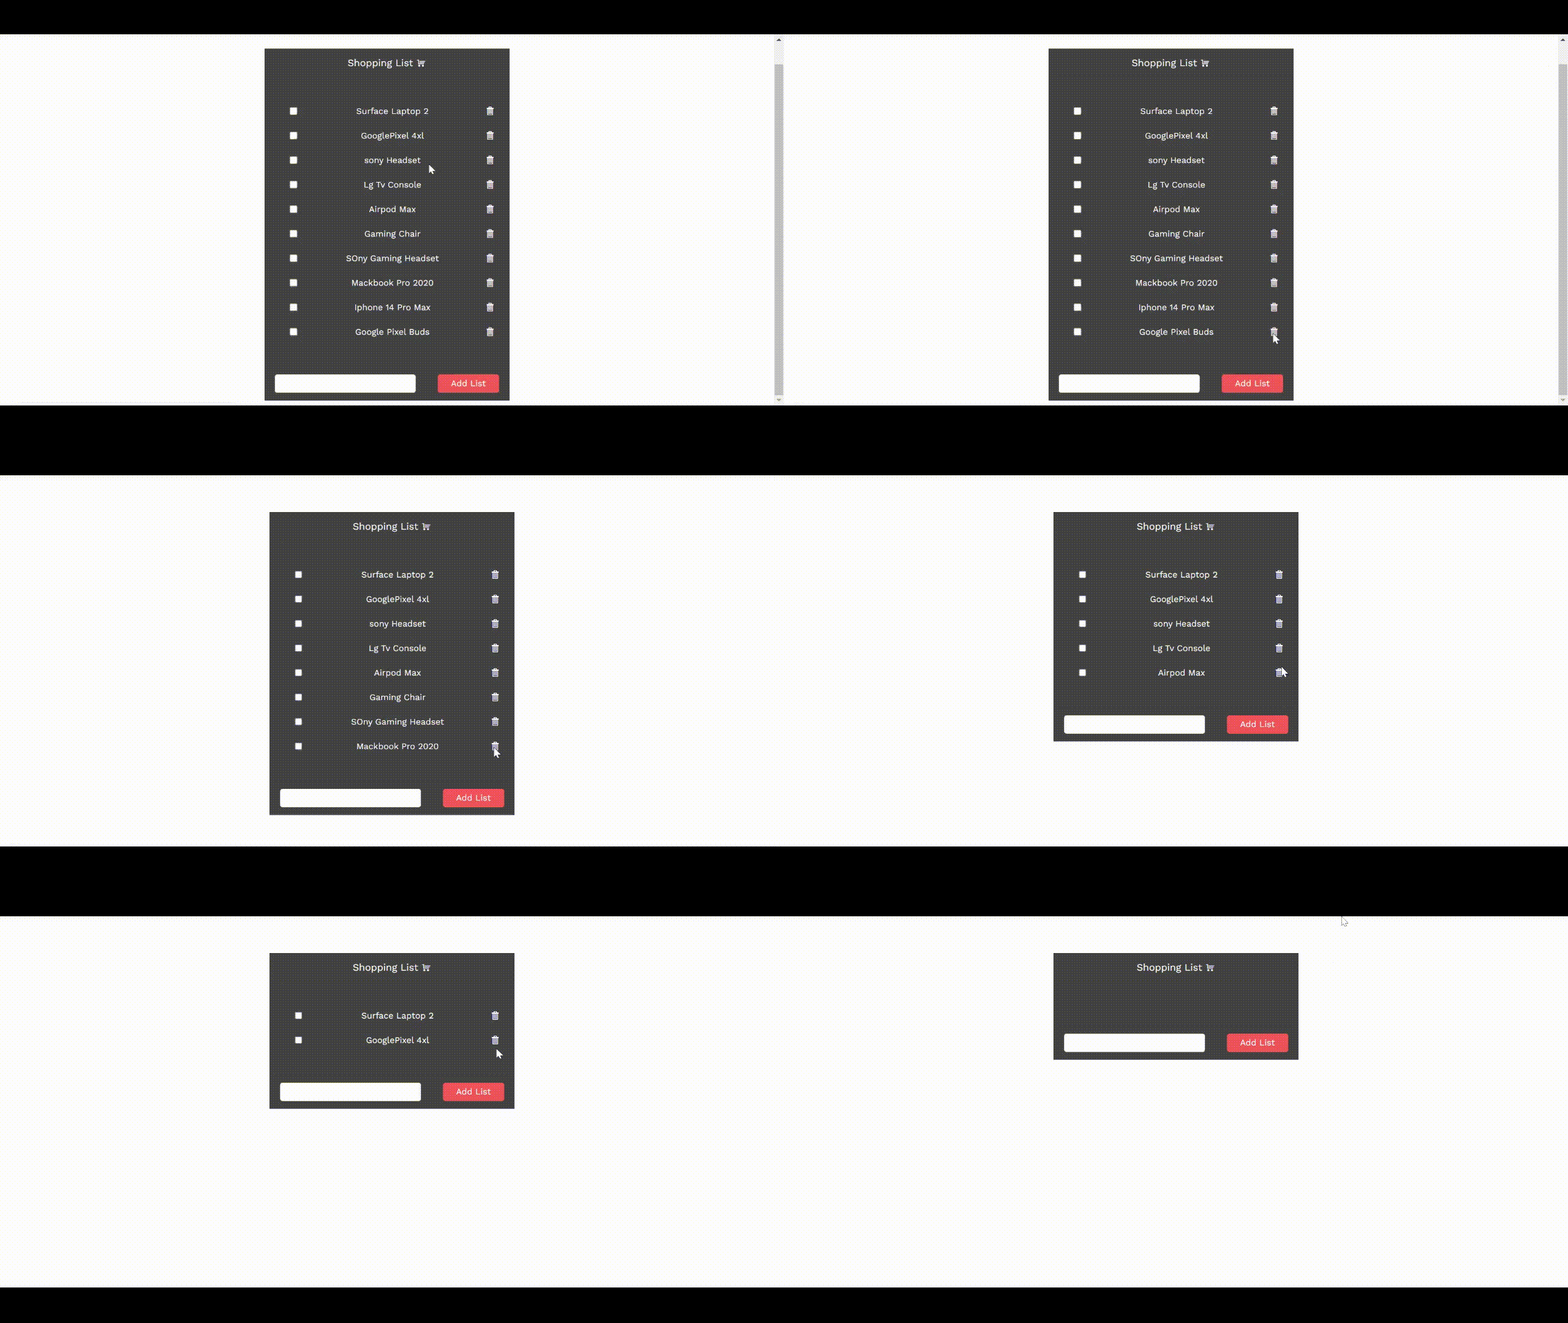
最后一步是check函数,它帮助我们跟踪已购买的商品和未购买的商品,创建:
<li v-for="(list, index) in lists" :key="index" :class="{ removed: list.checked }">
<div class="form-box">
<input type="checkbox" v-model="list.checked" class="input-box" />

</div>
</li>
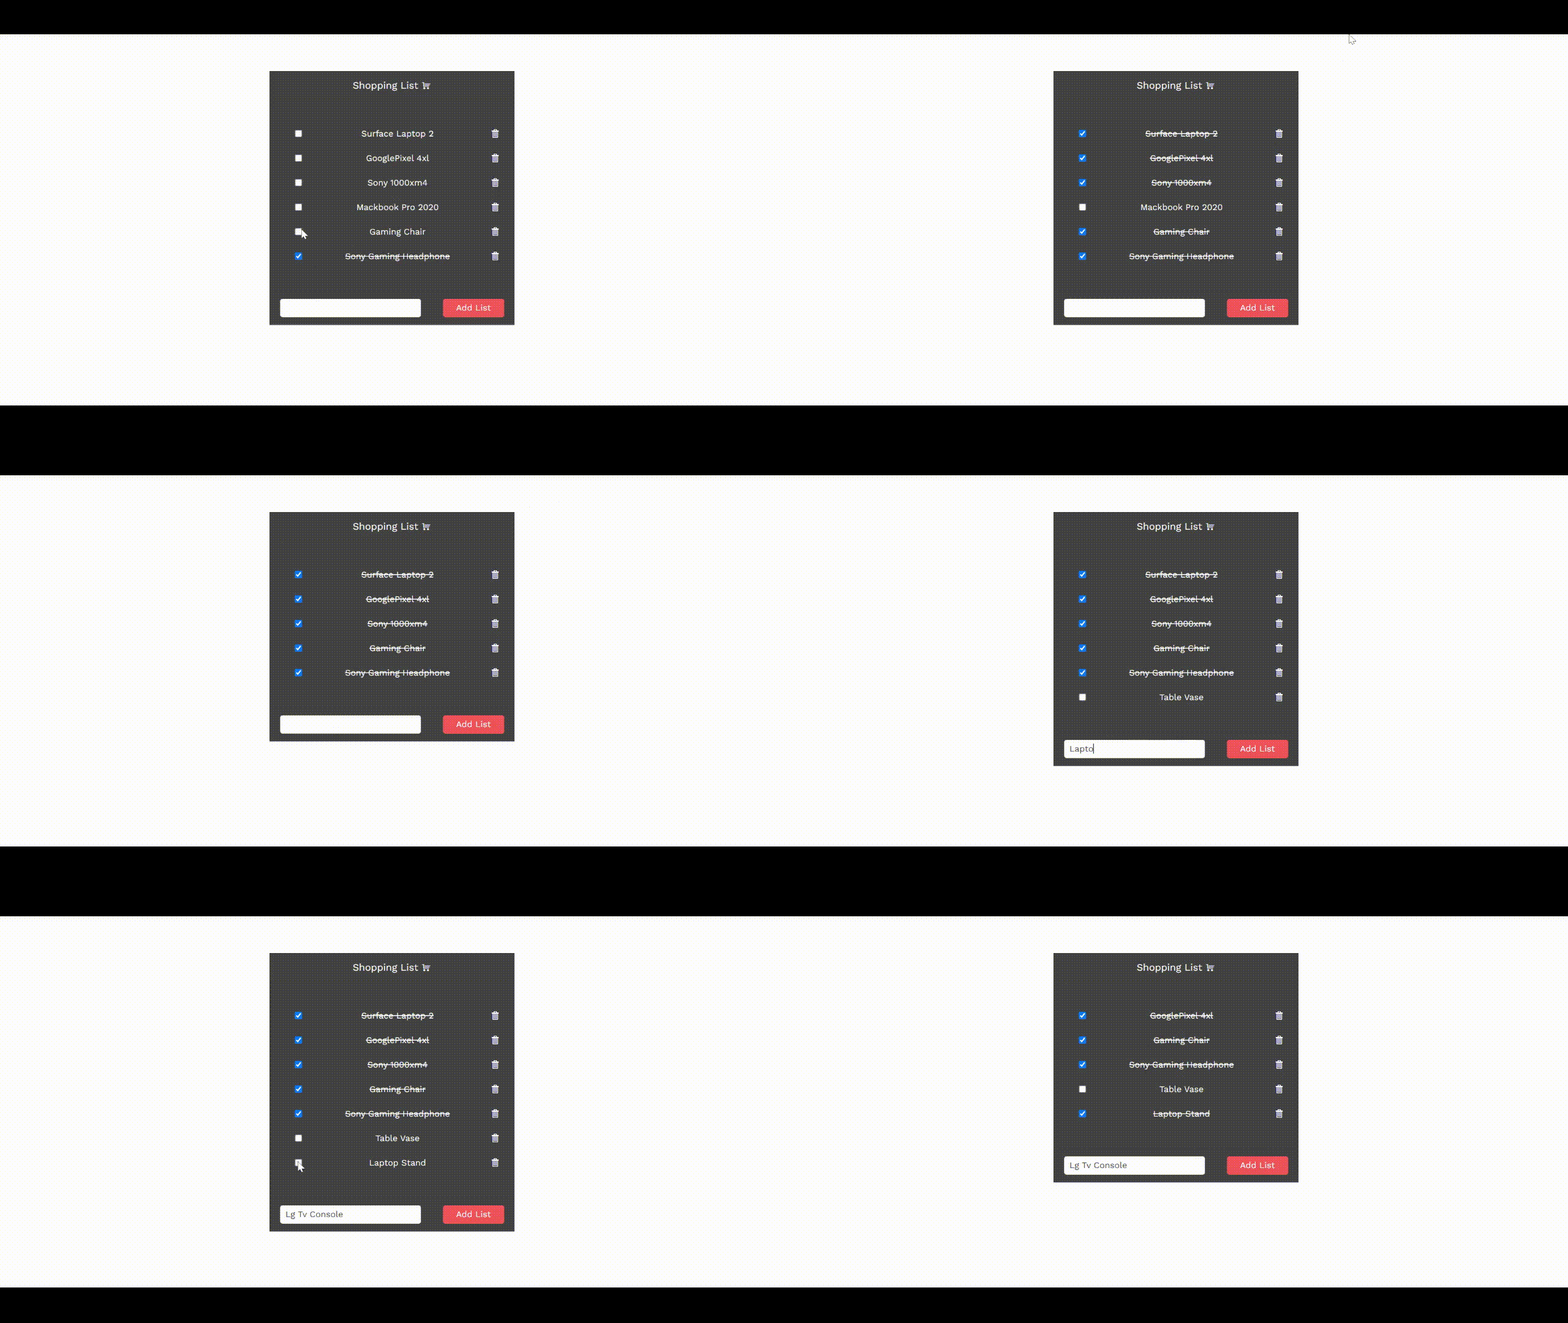
最后,让我们看看应用程序的整体功能是什么样子的。
了解最新Kendo UI最新资讯,请关注Telerik中文网!
