发布时间:2023-08-21
当我们构建带有数据的应用程序时,需要为客户提供排序、分组、过滤和聚合数据等选项,以便与之交互。我们可以通过多种途径实现这一目标:
因为我们已经了解了JavaScript,所以在本文中将使用内置的Array方法。对于大多数开发人员来说,这是一个很好的选择。
PS:给大家推荐一个实用组件~Kendo UI for Angular是专业级的Angular UI组件库,不仅是将其他供应商提供的现有组件封装起来,telerik致力于提供纯粹高性能的Angular UI组件,而无需任何jQuery依赖关系。无论您是使用TypeScript还是JavaScript开发Angular应用程序,Kendo UI for Angular都能为Angular项目提供专业的、企业级UI组件。
首先,让我们学习一下数组方法:
Array对象提供了排序和过滤操作的方法,但是对于分组和聚合数据,我们需要使用reduce()方法,分别解释一下:
数组的sort()方法返回排序后的数组。默认情况下,它按字母和升序将元素作为字符串排序,我们必须提供一个比较函数来按自定义顺序对元素进行排序。
filter()方法返回一个新数组,其中只包含通过所提供函数实现测试的元素。
reduce()方法帮助我们进行分组和聚合:
因为我们已经知道这些方法,所以将解决下面的场景,并找到复杂和高级主题的限制。
我们所在的公司想要一个带有产品列表的Angular应用,用户希望对数据进行过滤、分组、排序和聚合,经理想要尽快发布所有这些功能。
开始使用Angular CLI构建项目,您可以使用以下命令安装它:
npm install -g @angular/cli
安装好Angular CLI后,运行以下命令创建项目:
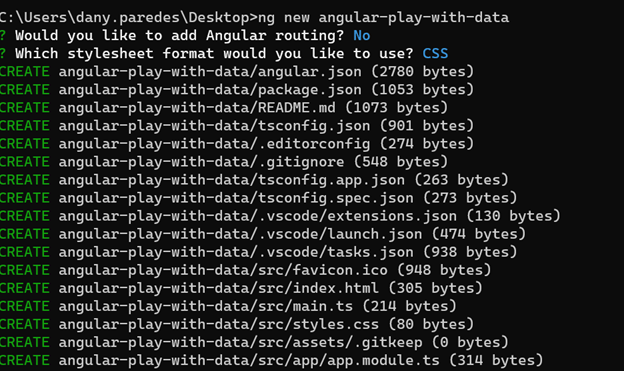
ng new angular-play-with-data
当被Angular CLI提示是否要添加路由时,选择“No”。另外,选择“CSS”作为首选样式表格式。

现在我们的应用程序已经创建好了,导航到目录:
cd angular-play-with-data
继续删除app.component.html中的示例标记和以下标记:
<h1>Working With Data in Angular</h1>
打开app.component.ts,用示例数据添加属性product:
products = [
{
"id": 1,
"name": "Product 1",
"category": "Category A",
"description": "Description of product 1",
"price": 9.99
},
{
"id": 2,
"name": "Product 2",
"category": "Category B",
"description": "Description of product 2",
"price": 19.99
},
{
"id": 3,
"name": "Product 3",
"category": "Category A",
"description": "Description of product 3",
"price": 29.99
},
{
"id": 4,
"name": "Product 4",
"category": "Category C",
"description": "Description of product 4",
"price": 39.99
},
{
"id": 5,
"name": "Product 5",
"category": "Category B",
"description": "Description of product 5",
"price": 49.99
},
{
"id": 6,
"name": "Product 6",
"category": "Category A",
"description": "Description of product 6",
"price": 59.99
},
{
"id": 7,
"name": "Product 7",
"category": "Category C",
"description": "Description of product 7",
"price": 69.99
},
{
"id": 8,
"name": "Product 8",
"category": "Category B",
"description": "Description of product 8",
"price": 79.99
},
{
"id": 9,
"name": "Product 9",
"category": "Category A",
"description": "Description of product 9",
"price": 89.99
},
{
"id": 10,
"name": "Product 10",
"category": "Category C",
"description": "Description of product 10",
"price": 99.99
}
]
基本的设置完成了,接下来我们创建一个组件来呈现产品列表。
在Angular CLI中,我们将使用-t标志为内联模板创建list-products组件,通过运行以下命令来防止创建html文件:
PS C:\Users\dany.paredes\Desktop\angular-play-with-data> ng g c -t list-products
CREATE src/app/list-products/list-products.component.spec.ts (642 bytes)
CREATE src/app/list-products/list-products.component.ts (229 bytes)
CREATE src/app/list-products/list-products.component.css (0 bytes)
用Input()装饰器添加属性products,这样我们就可以从app.component.ts中获取产品列表,并使用ngFor和插值添加模板。
import { Component, Input } from '@angular/core';
@Component({
selector: 'app-list-products',
template: `
<div *ngFor="let item of products">
<h3>{{ item.name }}</h3>
<p>{{ item.description }}</p>
<span>{{ item.price | currency }}</span>
</div>
`,
})
export class ListProductsComponent {
@Input() products: any;
}
在app.component.html中,使用app-list-products来显示产品列表。
<h2>All Products</h2>
<app-list-products [products]="products"></app-list-products>
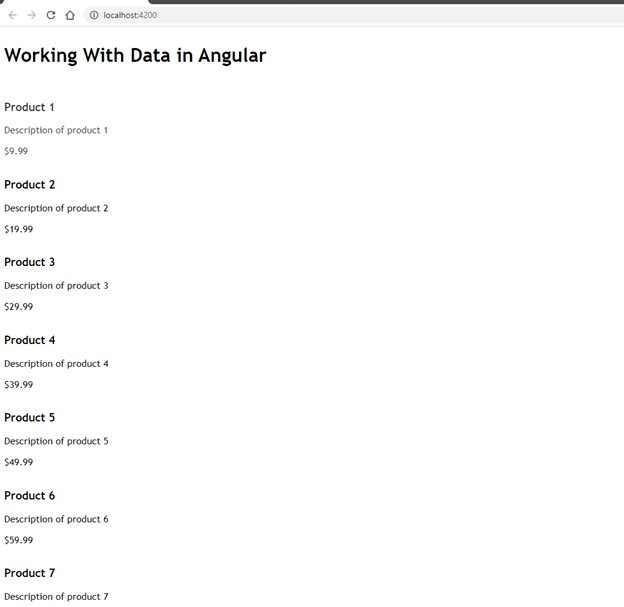
保存更改并使用ng -serve -o运行应用程序来自动打开浏览器。

Telerik_KendoUI产品技术交流群:726377843 欢迎一起进群讨论
了解最新Kendo UI最新资讯,请关注Telerik中文网!
